Today was a great day! We distributed 1300 computer devices to our students, accomplished this under our time goal, and the entire process was amazingly efficient and even a little fun. So with all of the horror stories about device distribution you might ask, “what led to such a successful roll-out?”. It’s all in the preparation.
“Prepare for everything!”
We began with a simple task; distribute 1300 computer devices to all High School students 9-12 in one day. We then refined that task to one hour per grade level. That gave us 50 minutes per class. We also wanted to throw in a short, 10-15 minute presentation by yours truly to introduce the device and tell a little about how it would be used at school. So if you’re doing the math, we were now down to distributing around 300 devices to 300 students in 35-40 minutes.
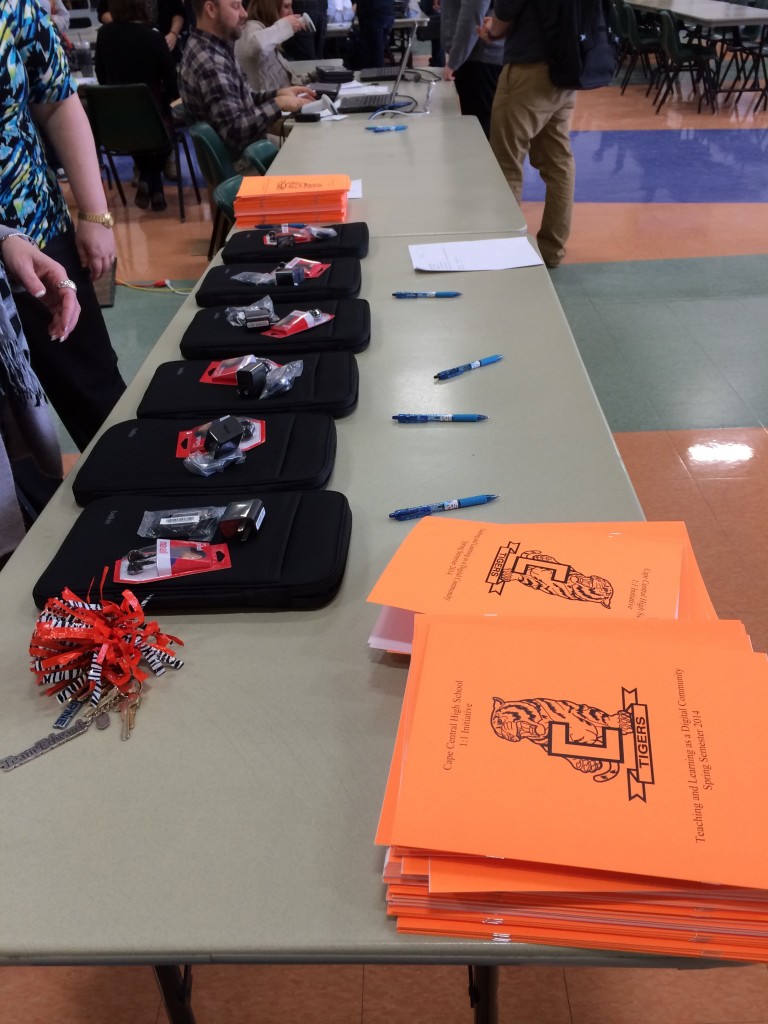
So what exactly did this distribution entail? Each device was etched with a barcode. That barcode had to be checked out to the individual student, linking the device to the student. They had to sign an Acceptable Use Agreement, pick up a copy of our Manual, receive a bag, charger, and earbuds, and then login to the device, Google Chrome, and listen to my presentation. Easy right?
We began meeting to discuss the process in October. We started with the logistics. We needed the devices to be checked out and in a timely fashion. The first thing that came to mind was Destiny, our library book program. If we could find a way to use the scanners to check out the devices, this would drastically cut down our distribution time. But of course, we ran into a problem. The etched barcode was not scannable by our library scanners. Solution? Print scannable stickers for each device.
Other issues discussed: Process and order of check-out, stuffing the bags with all the necessary items for efficiency, how to obtain 8 scanners, volunteers for the check-out process, what room to use for distribution, layout of distribution room, and much much more.
So with all of that, below are the key preparation points that I believe made our roll-out such a success. Maybe these tips can assist another district someday to gain the same kind of elated feeling that comes from a well designed plan working perfectly!
-Try to avoid typing anything! Use scanners when possible. We created stickers and barcodes for each student and for each device. We printed the list and divided the students alphabetically by counselor group. This meant we only had to identify the student, scan the name sticker, scan the sticker on a device, and hand them the device.
-Utilize a room that gives you maximum space and “flow”. We used our Commons even though we knew we would be limiting our time due to lunch. We used this room because it had the best set up for dividing the students in to 4 alphabet groups (the 4 corners), flowing through the distribution lines, and then having them take a seat to log in and listen to the presentation. We had originally planned on doing the presentation in a separate room, but decided to keep everything together to maximize our time.
-Make sure to plan for flow of traffic. Our group did an excellent job thinking about where students would line up, how they would move through the distribution line to pick up the necessary items, and how they would leave the lines to have a seat. Everything was coordinated to avoid congestion.
-Have extra Access Points on hand. We knew we would have 300+ students in one room accessing content online. We planned accordingly
-Make it an impactful, and meaningful event for the students. I created a device video that looped on our 3 overhead Big Screen TVs, We had all of the devices and bags laid out on display, and we added the presentation at the end. I think the presentation really gave them the feeling that they were at the beginning of a very important journey. It also gave us time to walk them through some very important tasks such as logging in to the device and Google Chrome.
-Plan for failure. We had a tech support desk set-up with 2 technicians to take care of any devices that wouldn’t boot up or had any issues at all. Unbelievably, we never had more than a handful of students at that desk.
-Take care of everything beforehand. We stuffed all of the bags with the chargers and earbuds so the distribution process would be as efficient as possible.
-Have as many volunteers as you can. We had 5-6 teachers, as well as our Superintendent and Assistant Superintendents on hand to walk around and help our students when needed.
-Let the students explore the device. By having the students sit down and play with the device until everyone was ready for the presentation, it gave some much needed exploration time to allow the students to customize and get acclimated to the device.
I wish you the best of luck with your future endeavors! Feel free to contact me anytime with questions.